1. Turn on the main switch.
2. According to the sample, select the measurement range, hang or remove the swing pin on the swing rod and adjust the handle of the buffer valve to align with the marking line.
3. Put the corresponding chuck into the upper and lower jaw base according to the shape and size of the sample.
4. Roll the recording paper on the roller of the tracer. This item is performed only when needed.
5. Start the oil pump motor, unscrew the oil delivery valve to raise the test table by 10 mm, and then close the oil valve. If the test stand is already in the raised position, you do not need to turn on the oil pump first to pump the oil, just close the oil delivery valve .
6. Clamp one end of the specimen into the upper jaw.
7. Start the oil pump to adjust the pointer to the zero point of the dial.
8. Start the lower jaw motor, raise and lower the lower jaw to an appropriate height, and clamp the other end of the sample in the lower jaw. Care must be taken to make the sample vertical.
9. Lower the drawing pen on the fader into drawing preparation state.
10. Slowly unscrew the oil delivery valve for the loading test at the loading speed required by the test.
11. After the sample breaks, close the oil valve and stop the oil pump motor.
12. Record the required values and plot them.
13. Open the oil return valve and set the passive needle to zero after unloading.
14. Remove the fractured specimen.
15. Compression and bending tests can be performed with reference to the above items.
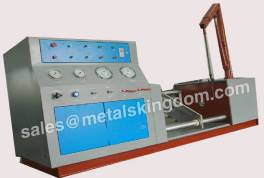
The valve pressure test bed is installed in a clean, dry and uniform temperature house. At the same time, the possibility of performing a long beam bending test on the machine and the possibility of using a mirror type extensometer for testing should be considered. Sufficient free area should be left around the testing machine. The test machine body and dynamometer do not need special foundation when installing, just make the general foundation according to the foundation diagram and leave the anchor screw holes for pouring. To find the level of the main body of the testing machine, you can place the spirit level on the outer circle of the cylinder to find the level according to the vertical and horizontal positions of the base and the horizontal direction. Use a spirit level with an accuracy of 0.10 / 1000 mm to find ± 1 grid. Horn to adjust. There are two holes on the top of the dynamometer for wire ropes for re-installation.

Valve Pressure Test Machine
Valve pressure test equipment operating procedures:
1.The instrument needs to be operated by a special person
2. Before use, you must check the oil level of the fuel tank and whether the oil pipe is loose.
3. Place the test block, turn the hand wheel, adjust the height of the screw rod, and adjust the test piece to 1-2mm from the upper platen.
4. Turn on the power and start the motor.
5. Close the oil return valve and control the oil delivery valve. When the strength level is small C30, the loading speed is 0.3-0.5Mpa / s. When the strength level is greater than or equal to C30, the loading speed is 0.5-0.8Mpa / s. ; When the test specimen is close to failure and begins to deform rapidly, stop adjusting the tester throttle until the test specimen is destroyed.
6. After the test piece is broken, open the oil return valve to make the piston fall back. At this time, the reading indicated by the pointer is the damage load of the test piece and recorded.
7. Clean up the test piece debris for the next test.
8. After the test is completed, press the stop key to turn off the motor and turn off the power.
Precautions for use of valve pressure test machine:
1. In daily use of the pressure testing machine, be sure to pay attention not to overload the load cell and not to be severely hit to ensure the accuracy of the testing machine;
2. Always check whether the upper and lower limit tightening nuts of the micro-switch are loose, and adjust in time if you find the loose;
3. In the process of using the pressure tester to perform the pressure test, you should first confirm the direction of the pull-type and pressure-proof, and confirm whether the display push-pull switch or signal light is correct;
4.In daily use, do not disturb the components in the back door of the control box;
5.The testing machine should be installed in a clean, dry room with no vibration and no corrosive gas influence around the house. Do not place it in a place with high humidity so that the accuracy will not be damaged;
6.Check the tightness of the chain every six months;
7.The testing machine should be operated or supervised by a person to ensure safety;
评论
发表评论